

QuickBooks error 1712 is an issue that arises due to damaged application files or improper permissions. Appear on your screen, especially when you try to reinstall the QB or open the application after completing an updating process. If you are also stuck in between this annoying glitch, then here is a blog written by experts for you! This guide compiled complete information, including the signs and symptoms, the common reasons behind its emergence, and tried and tested troubleshooting techniques to eliminate the error.
Understand the Meaning of QuickBooks Error 1712
QuickBooks Error 1712 is a common error that occurs when the user is trying to install or update the QB application in a corrupted folder. When you update or install the QB in a corrupted folder in your system, or you are using an incorrect updating process, then this issue emerges that hampers your workflow or creates a disturbance in system performance.
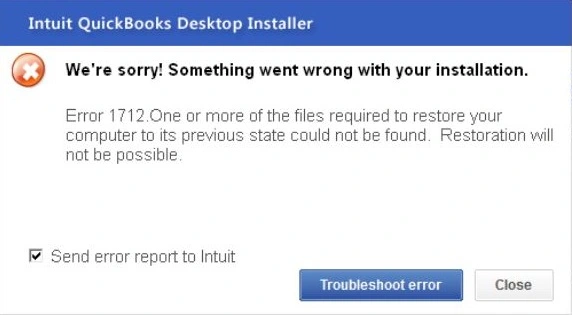
When the error hits your software, you will get a warning message stating – “we’re sorry! Something went wrong with your installation. Error 1712. One or more of the files needed to restore your computer to its previous state were not found. Restoration will not be possible”. To decode the error in a bigger pitcher, below we have discussed all the possible reasons for its emergence.
Common Causes that Triggered QuickBooks Error 1712
The QuickBooks install error 1712 can be caused by a variety of factors. A few have already been discussed, and the remainder are explained below. Let’s look at the factors which help in choosing the best solution to the problem.
- When there are damaged or corrupted entries in the Windows registry.
- If the user downloaded the QB setup files from an unauthorized or untrustworthy source.
- One reason for the interruption in installation is the attack of viruses or malware in your QB files.
- Another reason would be some incomplete downloaded files during the time of installing the QB.
- When there is a malfunctioning Windows installer application.
- The user is using an older version, which increases the compatibility issue.
What Would be the Symptoms of QuickBooks Install Error 1712?
Your application will always display an interruption when a problem is entered, alerting the user to the potential problem. With the points below, you can understand the error appearance and, without wasting time, try out the troubleshooting steps. Thus, carefully read the points that are listed below.
- The HTTP error appears repeatedly on your screen.
- Your system shuts down in between the process.
- The blue screen suddenly appears on your screen.
- The Quickbooks desktop starts responding slowly on any command or freezes.
- After multiple attempts, there is improper QuickBooks desktop installation.
Find Another Blog: QuickBooks error 1625
Three Essential Steps to Follow Before Implement Solutions
Before directly jumping into the troubleshooting steps, it is important to follow these three steps, which help provide you with more effective results.
- Firstly, restart your system.
- Now, open the Task Manager.
- Lastly, close all the QB versions running in the background and then reinstall the application once again.
How Can I Fix QuickBooks Error Code 1712?
To prevent the error from causing damage to your software, it is critical to use expert-recommended techniques to resolve the QuickBooks error code 1712 at its source. After applying the three-pointers, it is now time to undertake the step-by-step guidance mentioned below to troubleshoot the problem.
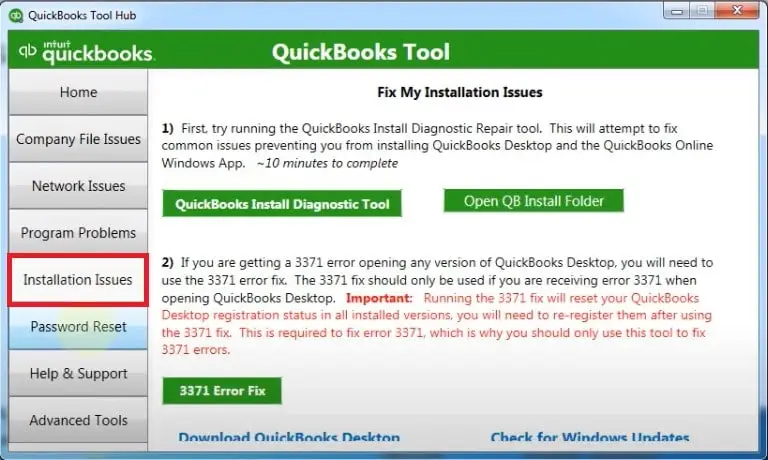
Method 1:- Run the QuickBooks Install Diagnostic Tool
The first step in troubleshooting the error is to use a QuickBooks install diagnostic tool, which is a popular error removal tool that automatically analyzes the issue in your system and resolves it by implementing a few simple steps. To run the tool effectively, read the instructions thoroughly and follow them exactly.
- The first step is to visit the official Intuit website.
- Now, search for the QBInstall tool.
- After you find it, click on the Download QBInstall Diagnostic Tool option.
- Wait until the tool is downloaded completely.
- Therefore, to run the QuickBooks install diagnostic tool, you have to close all the applications running in your system.
- Click right on the QBInstall diagnostic tool and then hit the open option.
- Next, search for the option that states, “I am having problems installing QuickBooks”.
- Hit the OK tab and restart your system to ensure all the changes you made are correct.
Method 2:- Run the Application as Admin
When you reinstall or update the QB application, your system may display two options. One is as a regular user, and the other is as an administrator. When a user selects the regular option by mistake, they lose access to make changes. As a result, the QB error code 1712 appears on their screen. To resolve this, run the application as an administrator by following the steps outlined below:
- To start the procedure, click on the Windows Start button.
- Then, enter the Control Panel option.
- In the control panel, click on User Accounts and search for your software version by looking for QBDataServiceUserXX.
- Now, navigate to the Change Account Type and hit the Administrator option.
- Click on the Apply tab to save all the changes.
- Lastly, follow the instructions for each QB Database Server Manager that you are using.
Method 3:- Reinstall the QuickBooks Desktop
If the above two methods fail to remove the QuickBooks install error 1712, then reinstalling the QB desktop might help resolve the issue. Let’s take a look:
- First, visit Intuit’s official website and download the latest QuickBooks Desktop application.
- Then, choose the Country, product and latest version of the QuickBooks application.
- Click on the Search option.
- When you find the latest version, hit the Download option.
- Wait until the downloading process is completed and reboot your system to check the persistence of QuickBooks 2019 error 1712.
Read Also: QuickBooks error 1311
Method 4:- Fabricate the New Local Windows User
The next troubleshooting technique is to create a new local Windows user and then convert it to admin. This will aid in the resolution of the problem. To make it clearer, we divided it into two steps: read carefully and follow the same:
Step 1:- To add a new window
- First, hit on the Start button and click on the Windows settings option.
- Then, click on the Account tab.
- In the left pane, hit the Family and Others option.
- Now, navigate to the Other User section.
- To add the local user in the window, hit on the “+” icon.
- Add a Microsoft account and set the username and password. (if you don’t want to use the passwords, then you can leave the column empty and click on the Next tab).
Step 2:- Run it as Administrator
- Click on the Start button and go to the Settings.
- In the settings section, click on the Account tab.
- Then, click on the Family & Other user option.
- Now, select the Account Owner name and click on the Change Account Type option.
- Lastly, click on the OK tab and restart the QB.
Method 5:- Use the Clean Boot in Windows
Our next troubleshooting solution is to run the clean boot in Windows, which automatically identifies the root causes of the emergence of the error and then resolves it by just following a few easy steps:
- First, you have to open the Run Windows by pressing Windows + R.
- Then, in the Search Box, type msconfig and hit the Enter tab.

- Go to the Services tab and select the Hide All Microsoft Services checkbox.
- Now, click on the Disable All option and visit the Task Manager section.
- Here, you have to disable all the startup items one by one and then hit the Disable button.
- Next, close the Task Manager and go back to the System Configuration window.
- Choose the Apply option and hit the OK tab.
- Lastly, reboot your system and check if there is still error 1712 when installing QuickBooks.
Method 6:- Check the Damaged QBDT Registries
The one, quite common reason for the error 1712 QuickBooks is a damaged or corrupted QBDT registry. If your system has a problem with registry files, then follow the steps mentioned below to fix it:
- If you are using QBDT, then close the file immediately.
- Now, open the Registry Editor by pressing the Windows start button.
- Then, in the search bar, type Registry.
- To open the registry editor, hit the Enter button.
- Thereon, navigate to the HKEY_CURRENT_USER and hit the Software option.
- Click on Microsoft and choose the Windows.
- After that, click on the Current Version and hit on the Explorer option.
- Next, click on the User Shell Folder and double-click on the App Data.
- Moving ahead, you have to replace the original value with the new value. To do this, follow the listed below command:
- For replacing the value – %USERPROFILE%\AppData\Roaming.
- For entering the value – \User\sagecorp\AppData\Roaming.
- Finally, launch the QBDT again and check if you are still getting error 1712 when installing QuickBooks for the desktop.
Read Another Blog: QuickBooks Error 15241
Ending of Walkthrough!
At the end of this article, we hope that you will be able to understand the root cause of this error and resolve the QuickBooks Error 1712 easily. However, if you guys are still facing problems, then without hesitation, seek the guidance of our QuickBooks experts by dialling the QuickBooks Support Team Number. Our expert team work for you 24/7 to guide you on the most effective path to make your QuickBooks workflow smooth and glitch-free.
